The below provides instructions on how to install Python and JupyterLab/Notebook using Anaconda.
Step 1: Install Anaconda
Anaconda automatically installs Python and most of the packages used in python programming.
- Go to the Anaconda website and install Anaconda
- Follow all the recommended installation options.
Step 2: Install python .NET on Anaconda Environment
As the IDEA IOM and API are provided as .NET modules we will need to install python .Net within our python environment.
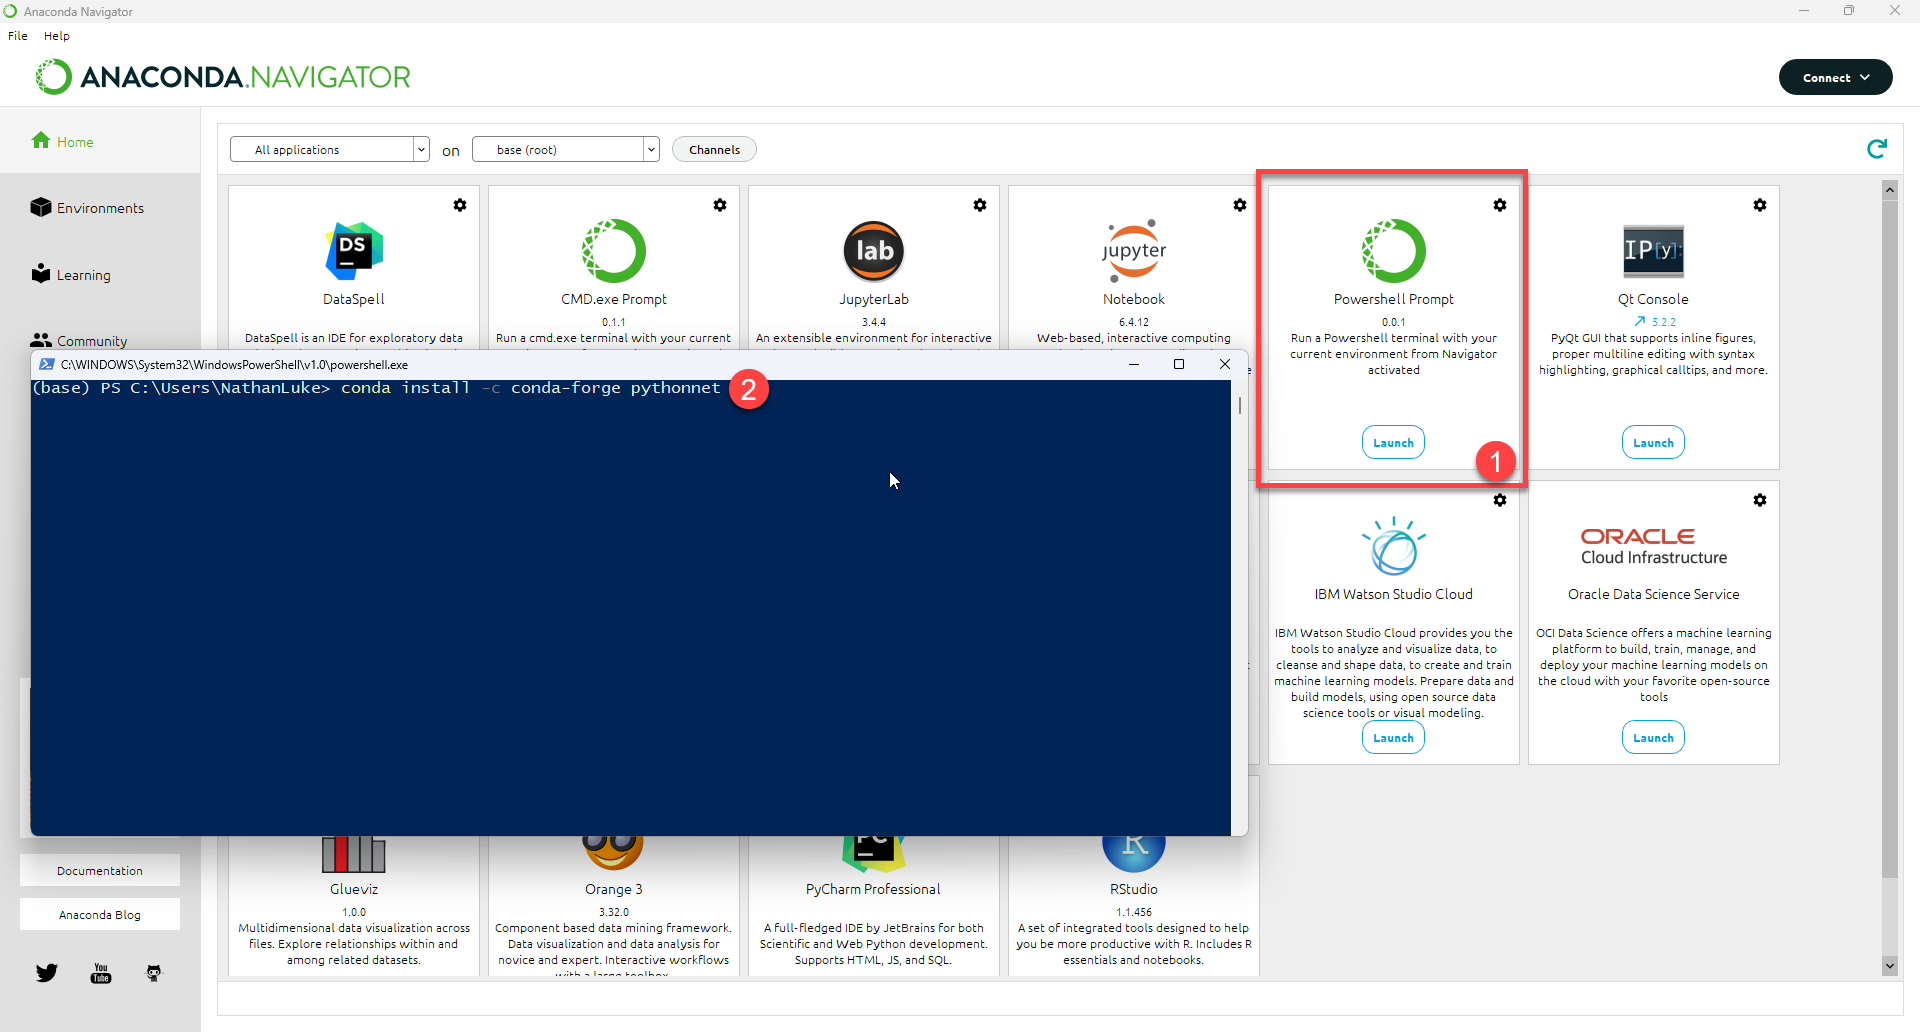
- Open Anaconda Navigator Application and then open the anaconda shell. Copy and paste the below to Add.
conda install -c conda-forge pythonnet

- ENURE that python .Net Version 3 or greater is installed.
- Wait for confirmation python .Net has been installed and then close the Powershell window.
Step 3: Launch JupyterLab from Anaconda Navigator and Test IdeaStatiCa.PlugIn
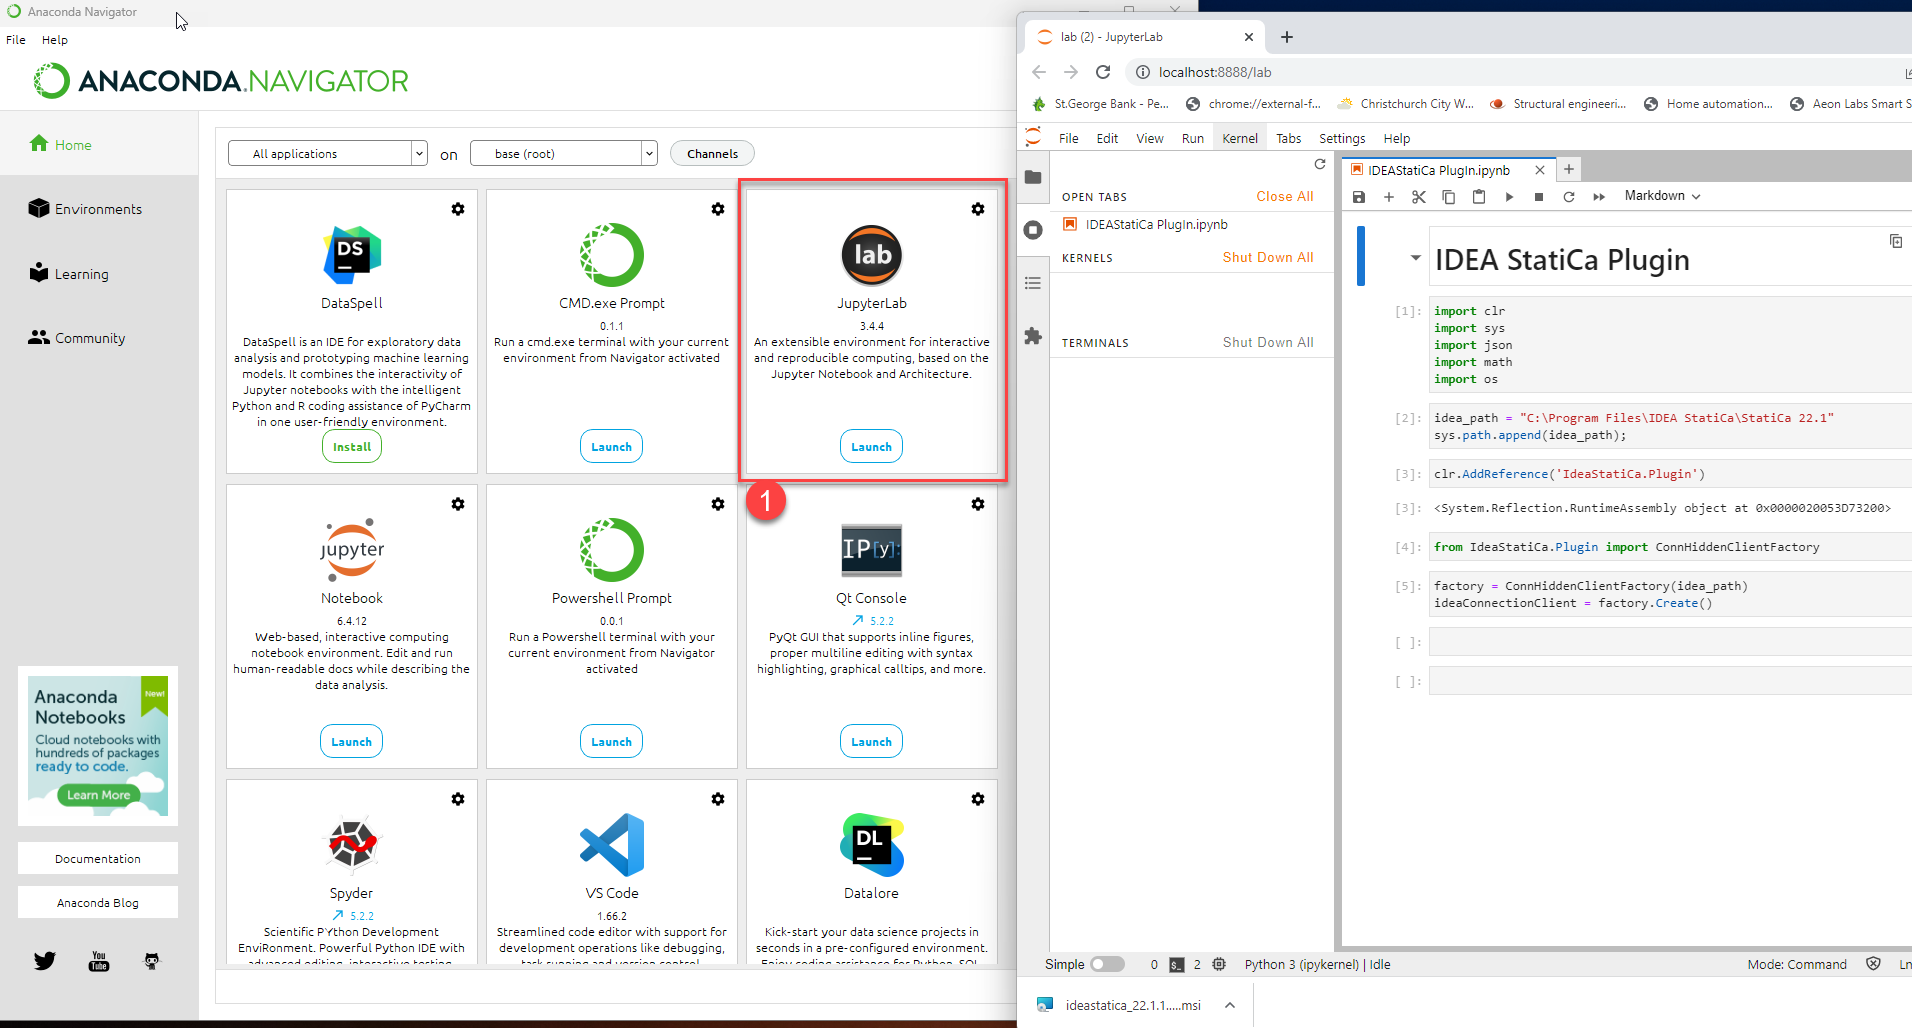
We can now open JupyterLab directly from the Anaconda Navigator

- Start a new notebook and use the following code to test
import clr
import sys
import json
import math
import os

idea_path = "C:\Program Files\IDEA StatiCa\StatiCa 22.1"
sys.path.append(idea_path);

clr.AddReference('IdeaStatiCa.Plugin')
from IdeaStatiCa.Plugin import ConnHiddenClientFactory

factory = ConnHiddenClientFactory(idea_path)
client = factory.Create()

client.OpenProject('MyConnectionProject.ideaCon')

## Do Something with the Opened Project.

client.CloseProject()
client.Close()
If an error occurs, try to restart the kernel and re-run from top to bottom.